Как установить parrot os
Установка Parrot Security ОС
Зачем устанавливать Parrot OS 3.1.1?
Parrot Security OS используется для выполнения тестов на взлом, оценки уязвимостей, компьютерной криминалистики и анонимного серфинга. Он используется главным образом в судебном отделе. В этой статье объясняется установка Parrot Security ОС. Делается это очень быстро. Если будут вопросы, пишите их в форму комментариев.
Установка Parrot Security ОС
Скачайте последнюю версию Parrot OS со своего официального сайта,
https://www.parrotsec.org/download.fx
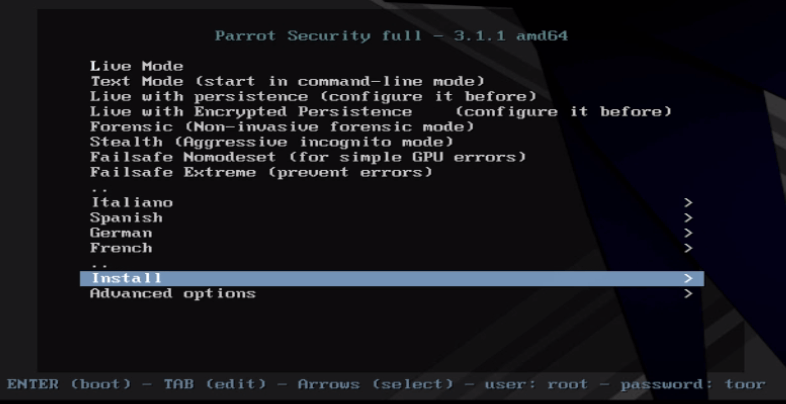
Загрузите его через DVD или USB. Страница установки Parrot выглядит следующим образом, нажмите «Установить», чтобы продолжить.
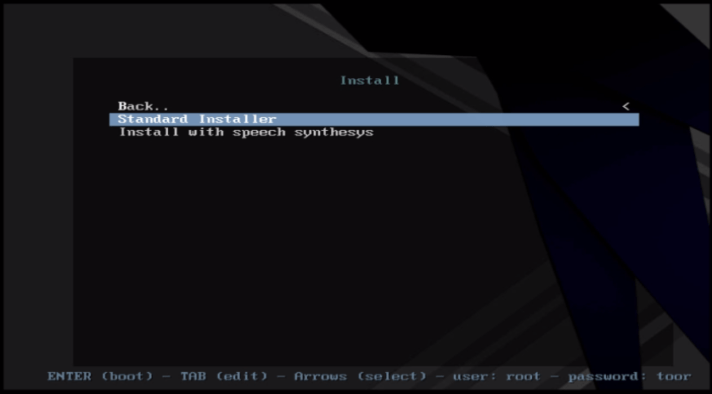
Затем выберите тип выполняемой установки. Например, мы выбираем стандартный установщик.
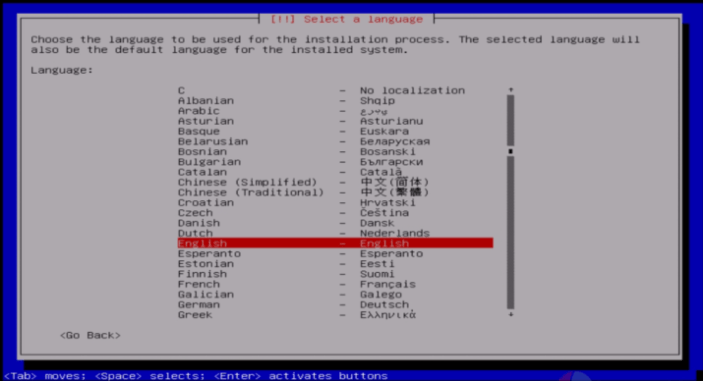
Выберите предпочтительный язык.
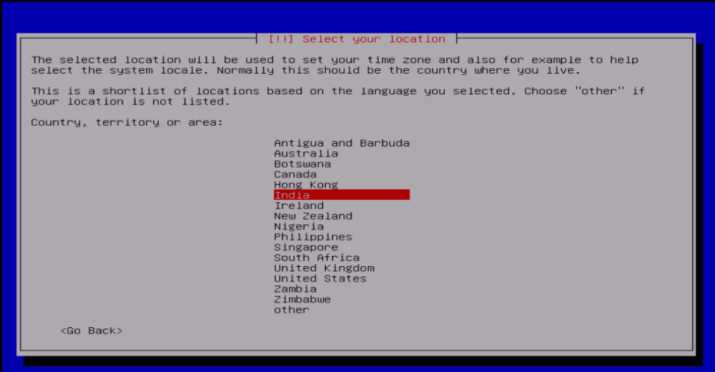
Установите местоположение и нажмите клавишу ввода.
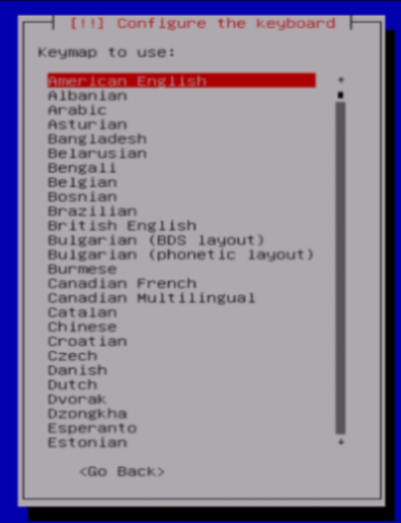
Настройте свои настройки клавиатуры, выбрав тип клавиатуры, которую вы хотите использовать.
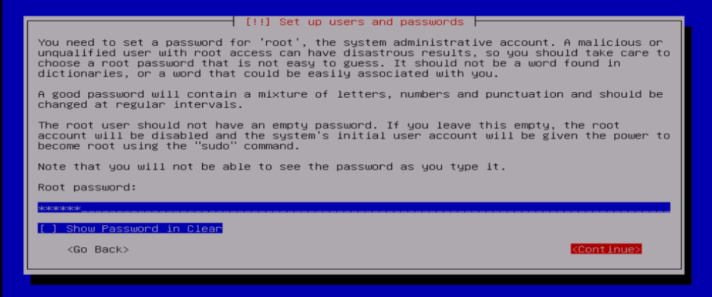
Создайте пароль root и нажмите «Продолжить».
Чтобы создать нового пользователя
В новом окне придумайте новый пользователь и пароль для Parrot OS. Введите имя пользователя.
Задайте пароль для пользователя.
Выберите ручной раздел, чтобы создать собственный раздел.
Выберите жесткий диск и нажмите клавишу ввода.
Нажмите «Да», чтобы продолжить.
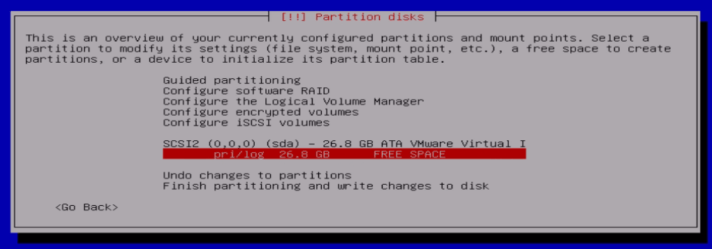
Создайте таблицу разделов, выбрав свободное место на жестких дисках.
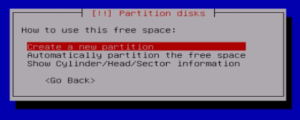
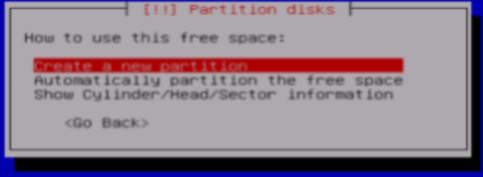
Теперь нажмите «Создать новый раздел» и нажмите «Ввод».
Укажите размер основной точки монтирования и нажмите «Продолжить».
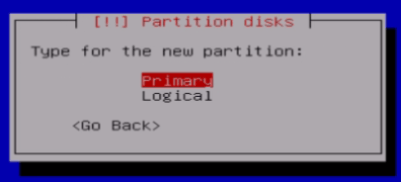
Выберите тип раздела.
Затем установите место для раздела.
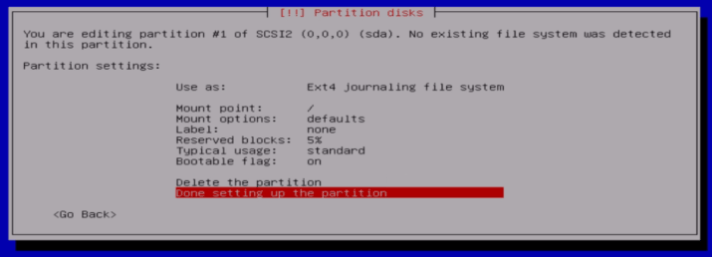
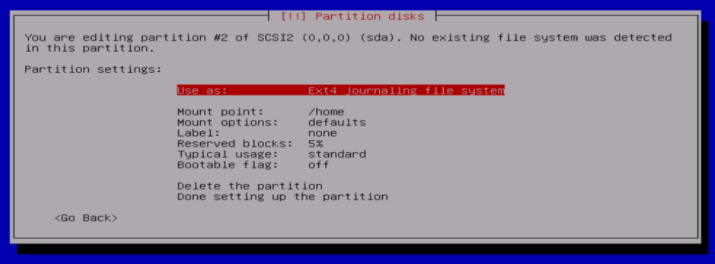
Проверьте настройки раздела и выберите «выполнить настройку раздела».
Чтобы создать раздел подкачки, нажмите «Создать новый раздел».
Укажите размер раздела подкачки и убедитесь, что он вдвое превышает объем оперативной памяти.
Выберите тип раздела.
Установите место для нового раздела.
Проверьте данные вашего системного раздела.
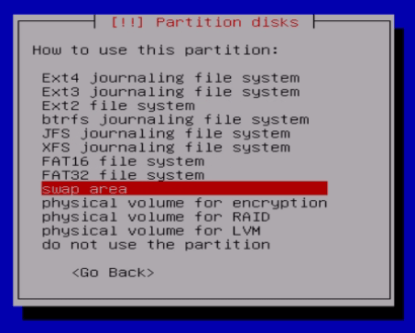
Затем выберите область подкачки для таблицы разделов.
Теперь выберите выполненную настройку раздела.
Нажмите «Готово» и выполните запись изменений на диск.
Нажмите «Да», чтобы подтвердить и продолжить.
Теперь начинается установка.
Выберите «Да», чтобы установить загрузчик grub.
Мы уже писали о том, как можно установить загрузчик Grub2 на ваше устройство.
Выберите жесткий диск для установки grub.
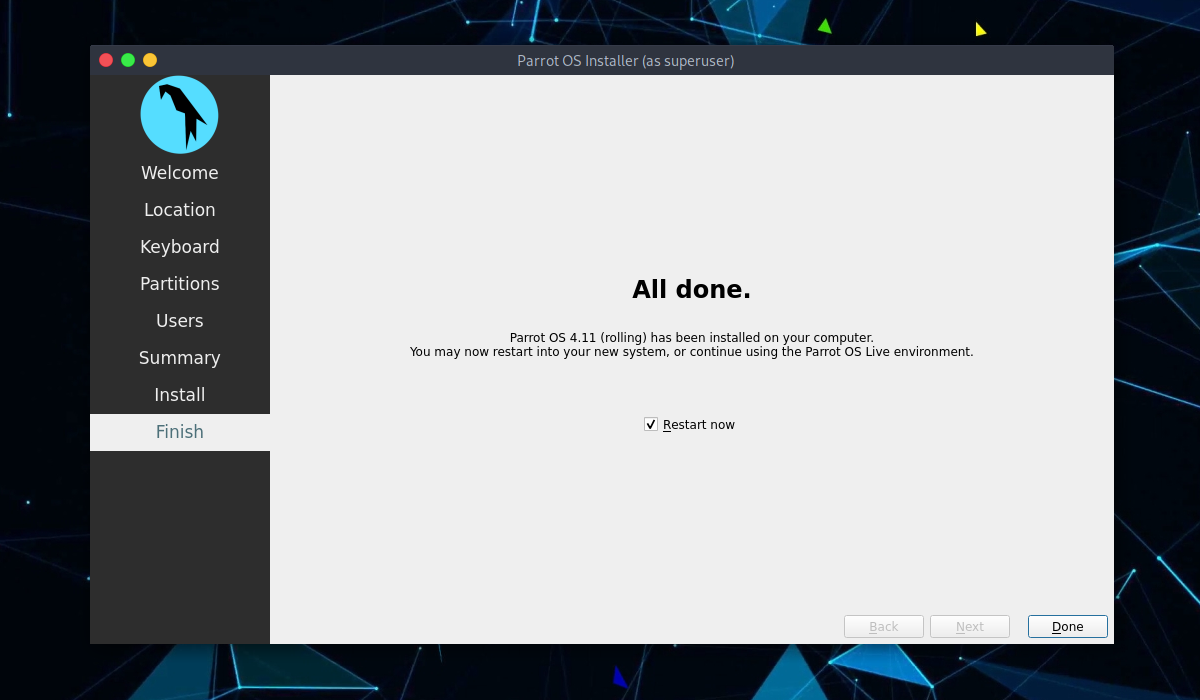
После успешного завершения установки нажмите «Продолжить» и перезагрузите систему.
После перезагрузки войдите в Parrot OS, используя учетные данные для входа.
Выводы
Готово! Parrot OS был установлен на ваше устройство. Если у вас остались какие-то вопросы — задавайте их в ниже. Делитесь ссылкой на свои страницы в социальные сети Facebook, Google+, Twitter и ВКонтакте.
Если вы нашли ошибку, пожалуйста, выделите фрагмент текста и нажмите Ctrl+Enter.
This guide will cover the following steps:
Create a new Virtual Machine
Create a new Virtual disk (VDI, dynamic allocation etc. )
Modifying VirtualBox settings (allocating physical and Video memory, selecting OS Type, CPU acceleration etc.)
Loading Parrot Security ISO
Booting Parrot Security ISO (initial info, location, timezone etc.)
Parrot Security disk partitioning
Finalizing installation and running Parrot Security on VirtualBox.
Things you need to install
If the OS you are using is Windows or MacOS, here is the link to the VirtualBox installer.
On GNU/Linux it is the same, but you can install it via CLI:
Follow the same steps EXACTLY to install and run Parrot via VirtualBox in your machine.
Before proceeding, make sure you have successfully installed VirtualBox. On GNU/Linux you can check this by opening a terminal and typing virtualbox and/or the icon to start VirtualBox will be visible in the menu. For other operating systems there will be a similar icon to start it.
Once you’ve installed VirtualBox:
Enter Parrot Security as the name. Set «Type» to Linux, and set «Version» to Other Linux (64-bit).
The OS can run on machines with 512 MB of RAM, but at least 2 GB is strongly recommended for both Parrot Security and Home Editions.
Choose the best setting for your machine and click Next.
On this screen select Create a virtual hard disk now (2nd option) and click Create.
On the next screen select VDI – VirtualBox Disk Image as your Hard drive file type.
Click Next.
Select Dynamically Allocated and click Next on Storage on physical hard drive window.
On File location and size screen, it will show 8.00 GB as the default size (which we’ve set on Step 1.1). In this example we have increased it to 20 GB for storage reasons.
Choose which fits your needs and click Next.
So far, we’ve done the following, checklist for you:
At this point you should see the following screen:
Depending on which ISO you downloaded, select the correct Version here.
As Parrot Security is derived from Debian, I’ve selected Other Linux (64-bit) on General > Basic.
Select General > Advanced TAB and change Shared Clipboard and Drag ’n’ Drop to Bidirectional. This will allow you to copy paste files from your HOST machine on the fly. Confirm by clicking OK.
Select System > Motherboard, un-check Floppy (who has a floppy anymore?) and check the box to Enable I/O APIC.
Note that you can change base memory allocation in the same screen. We’ve set it to 2048 MB previously. If your machine got 8.00 GB RAM, it means that you can allocate a lot more to make Parrot Security respond faster as a virtual machine.
If you feel your Virtualized Parrot Security is slow, you should increase this Base Memory allocation.
The calculations are as follows:
Multiply 1024 with the amount of Memory/RAM you want and put the value here.
Sets the number of virtual CPU cores the guest OS can see. 2 virtual cores works well. With 4, 6, and so on, performance will be much better.
You should not configure virtual machines to use more CPU cores than are available physically. This includes real cores, with no hyperthreads. See processor tab on VirtualBox website.
Check the box for Enable PAE/NX.
Select Display > Screen > set Video Memory to 128 MB. This allows for a good responsive desktop environment.
Also check the box for Enable 3D Acceleration.
If you have more than one monitor, you can change your settings here too.
Select Storage > Controller: IDE and highlight Empty CD icon. Now on your right, you should be able to click on the little CD icon (it should be CD/DVD Drive: IDE Secondary Master already, if not change it) and select your downloaded ISO.
Once you select your downloaded ISO (in this case, it’s Parrot Security 4.11.2 ISO). See the properties and information’s changes accordingly.
Important: if your disk size is mismatched, you might have a corrupt disk. Refer to Parrot Security chapter through this documentation for size related info. You can also do a SHA1 check to ensure your disk is not corrupted.
Note: if you want to test Parrot in live mode, check the «Live CD/DVD» box
If your computer is connected to the internet, select NAT on Network > Adapter 1. You can enable more network adapters if you feel you want to do so.
Firstly, make sure you have installed the extension pack, or you will not be able to enable USB 2.0 and 3.0 controllers.
If you have not installed it, you can download it here
Then go to files > preferences > extensions, on the right there will be a + button where you can install the extension.
In GNU/Linux, you could also install it from the terminal with sudo apt install virtualbox-ext-pack
Once installed, it will enable VirtualBox Remote Desktop Protocol (VRDP) support and Host webcam passthrough support.
Finally, by clicking on your new virtual machine, this is what you should see:
You can always change the configuration the way you prefer.
From VirtualBox Main Screen, click on Start and boot Parrot Security.
From VirtualBox Main Screen, it will boot Parrot Security, click in the Virtual Machine, select Try/Install and then click Enter.
Here you can test the OS in its entirety, then you can proceed with the installation.
Click on Install Parrot:
and the default installer, Calamares, will start.
In this example we have chosen American English. Click on Next.
Here we have selected America and New York zone. Click on Next.
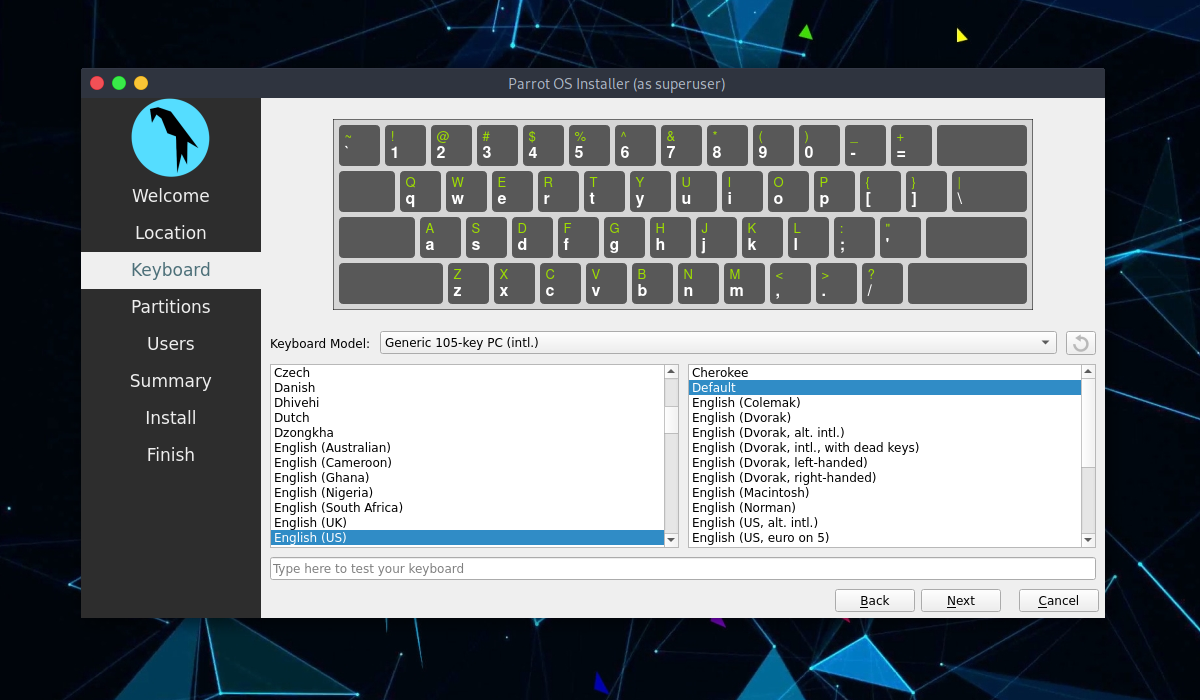
Select the layout that best suits your keyboard, you can also test the keyboard’s key where it says type here to test your keyboard. Click on Next.
As this is all Virtualized, you can choose anything you want to.
We think that guided partitioning for less experienced users is recommended, 40 GB or more are enough, unless you are going to install a lot more programs or keep more files on your hard drive.
If you want, you can also encrypt the system by adding a passphrase:
You will be asked to create a new user, for simplicity we have chosen a user. You can enter any name in here.
Then, click on Next
Step 6 Completing the installation process
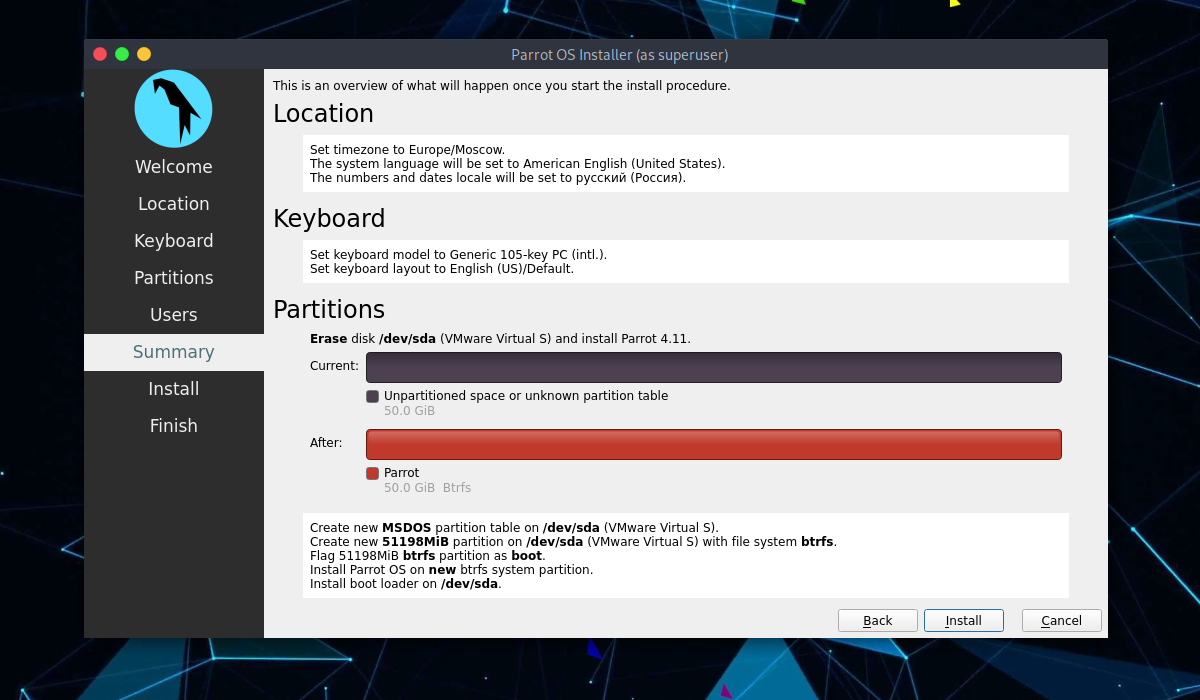
Finally, a summary of the choices made during the procedure:
You can decide whether to change the chosen settings, and then go back, or proceed with the installation of the system. Click on Install.
Confirm by clicking Install now
And wait for the installation to complete!
With an SSD (Sata), it takes a few minutes.
Well done! You have successfully installed ParrotOS on your computer!
Step 7: Login to Parrot Security for the first time
Enter your Password:
You just installed Parrot Security! Congrats!
This is a guide that will help you install Parrot OS (latest version) on your computer step-by-step through the default and official installer: Calamares.
This guide applies to both the Security and Home Editions.
Any problems or missing details, please report it to the official Parrot forum.
Insert your installation media into your computer and through your BIOS settings start Parrot. A screen will appear with several options, including some more advanced ones.
Select Try/Install and press Enter.
Wait for the OS to load (few seconds).
Welcome in Parrot Live
Here you can test the OS in its entirety, then you can proceed with the installation.
Click on Install Parrot:
and the installer, Calamares, will start.
Let’s start!
The next step is selecting the system’s language.
Choose your language.
Click on Next.
Then select your Region and Zone. Click on Next.
Now, you can select the keyboard layout. There are many variations available, and you can test them where its written «Type here to test your keyboard».
Parrot Security disk partitioning
We think guided partitioning for less experienced users is recommended, 40 GB or more is enough, unless your going to want to install a lot of programs or keep larger file on your hard drive.
If you want, you can also encrypt the system by adding a passphrase:
Select the options that you think will be most useful to you and click on Next.
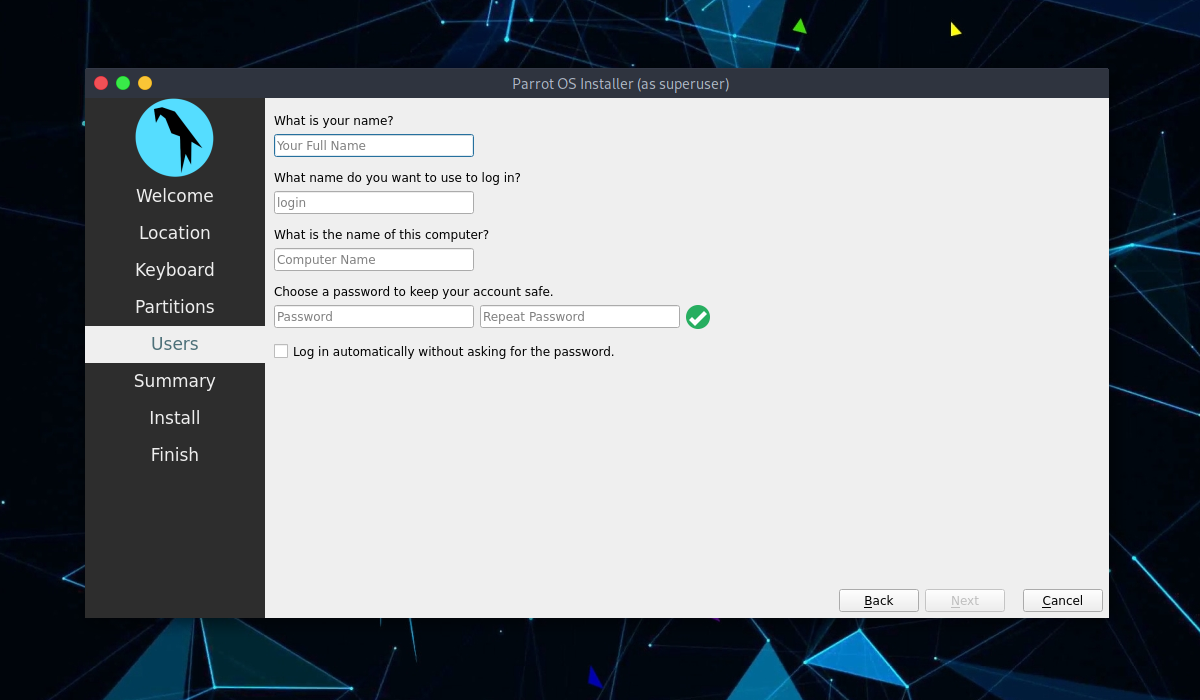
Creating a new user account
You will be asked to create a new user, for simplicity we have chosen a user. You can enter any name in here.
Remember that it is the password to access your OS account, we recommend you to create a long and complex one.
Then, click on Next.
Completing the installation process
Finally, a summary of the choices made during the procedure:
You can decide whether to change the chosen settings, and then go back, or proceed with the installation of the system. Click on Install.
Confirm by clicking Install now
And wait for the installation to complete!
With an SSD (Sata), it will take a few minutes.
Well done! You have successfully installed Parrot OS on your computer!
Login to Parrot for the first time
Enter your Password:
Welcome to Parrot! Congrats!
Установка Parrot Security OS
Последняя на данный момент версия под номером 4.11 вышла 28 марта 2021 года. В этой версии дистрибутив получил обновление программного обеспечения до новых версий и новую версию ядра Linux – 5.10. В этой статье будет рассмотрена установка Parrot Security OS на компьютер, или виртуальную машину.
Подготовка к установке
Parrot Security OS поставляется в трёх редакциях:
Перед тем как перейти к установке необходимо скачать образ установщика и записать его на носитель. Далее будет рассмотрен процесс записи образа на носитель.
Шаг 1. Загрузка образа
Скачать необходимую редакцию образа можно на официальном сайте. Также на выбор доступны различные графические оболочки рабочего стола – Mate, KDE, XFCE в зависимости от редакции. Для загрузки образа достаточно нажать на кнопку Download или выбрать Torrent ссылку для загрузки с помощью торрента:
Будет использоваться образ с редакцией Security Edition и графической оболочкой MATE который занимает 4,1 Гб, что не так уж много учитывая полный набор инструментов, которые поставляются с данным дистрибутивом.
Шаг 2. Запись образа на носитель
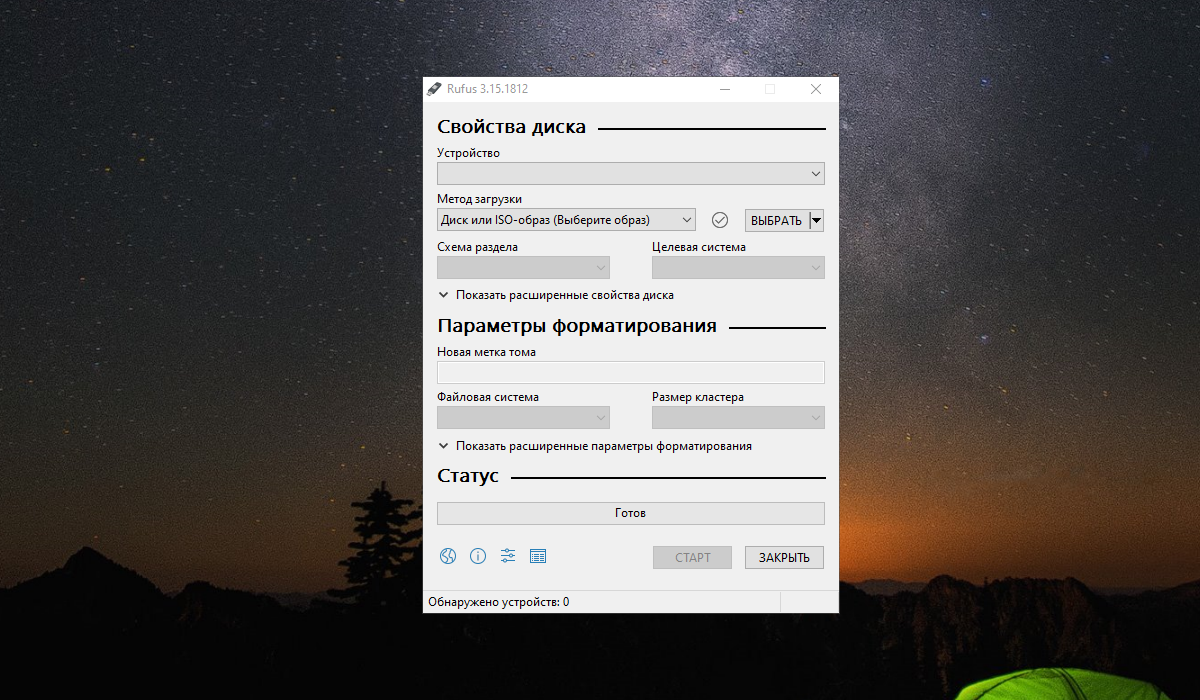
Далее необходимо записать образ на установочный носитель. В качестве носителя будет использоваться флешка, но также образ можно записать на оптический диск. В Windows можно использовать программу Rufus:
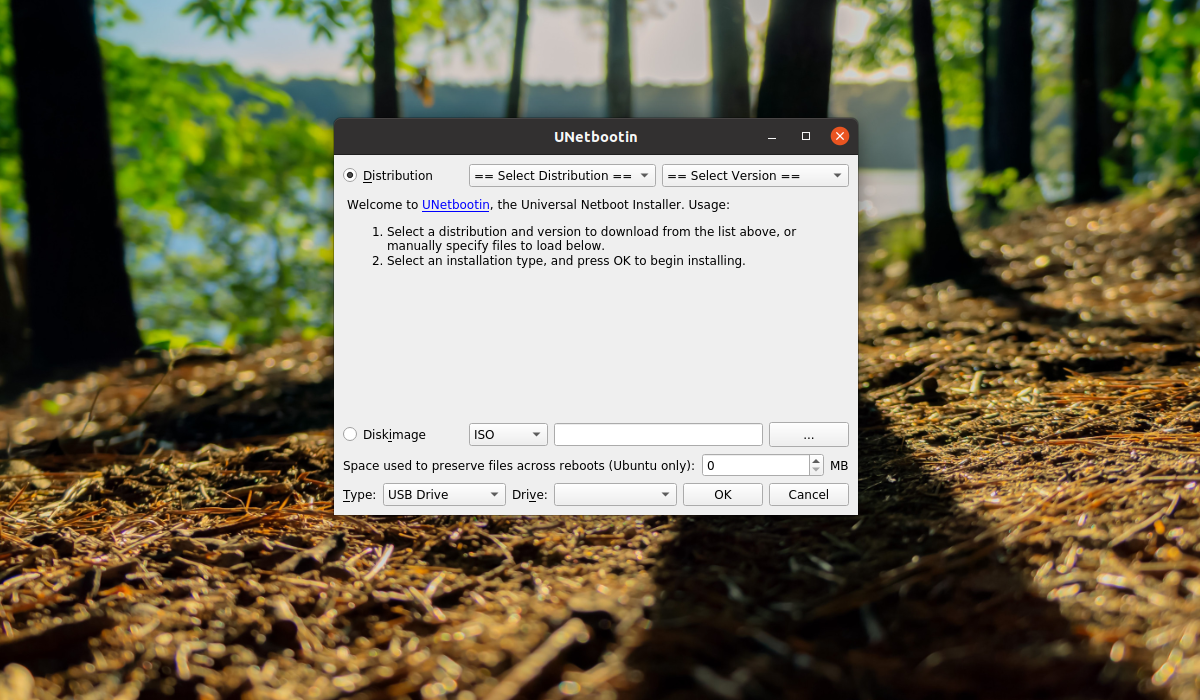
Для записи на флешку в Linux можно воспользоваться программой unetbootin:
Что касается записи на оптический диск, то в Linux можно использовать такие программы как k3b или brasero. В Windows присутствует программа UltraISO.
Шаг 3. Настройка BIOS или виртуальной машины
Когда образ будет записан на носитель необходимо настроить BIOS. Перезапустите компьютер и во время загрузки нажмите клавишу F2, F8, Del или Shift+F2 в зависимости от модели вашего ПК. Далее необходимо перейти на вкладку Boot и в пункте 1st Boot Device выбрать в качестве первого места носитель, на который записан образ Parrot Security OS. Далее перейдите на вкладку Exit и выберите Exit & Save Changes.
Установка Parrot Security OS
Шаг 1. Меню загрузчика
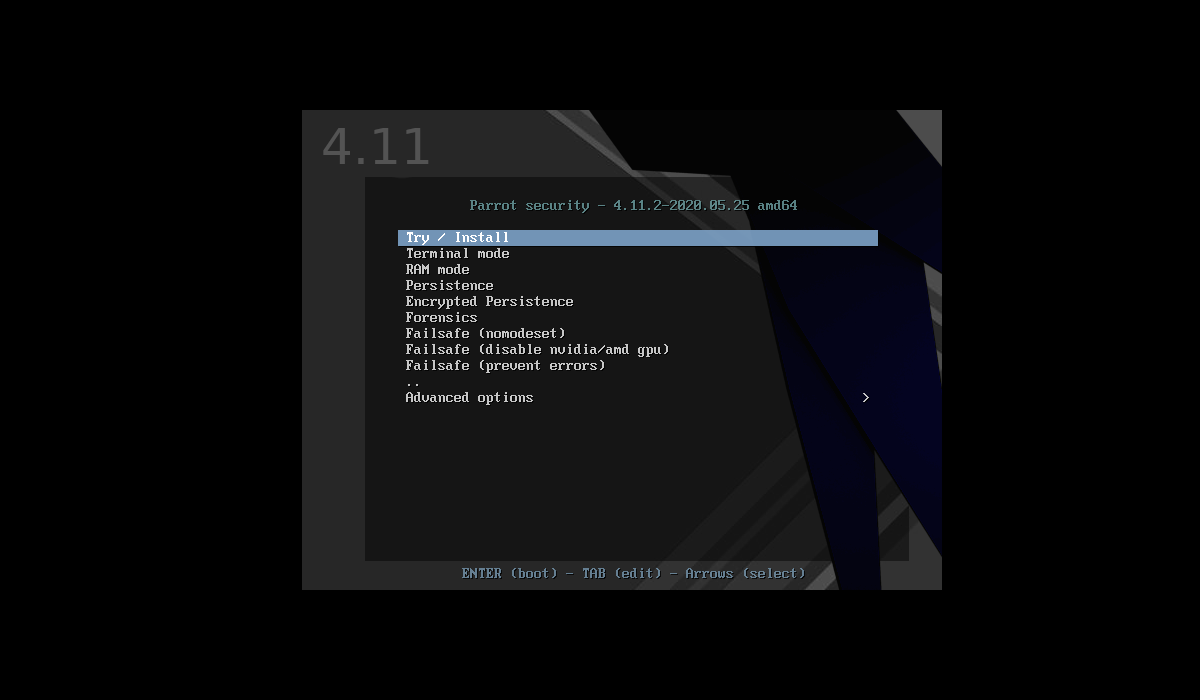
Сразу после перезагрузки компьютера появится меню загрузчика, в котором можно запустить систему в Live режиме для теста и дальнейшей установки:
При выборе опции Try / Install система будет запущена в Live режиме. Все изменения, которые будут внесены (в том числе и сохранение файлов) не будут сохранены после перезагрузки ОС.
Шаг 2. Запуск установщика
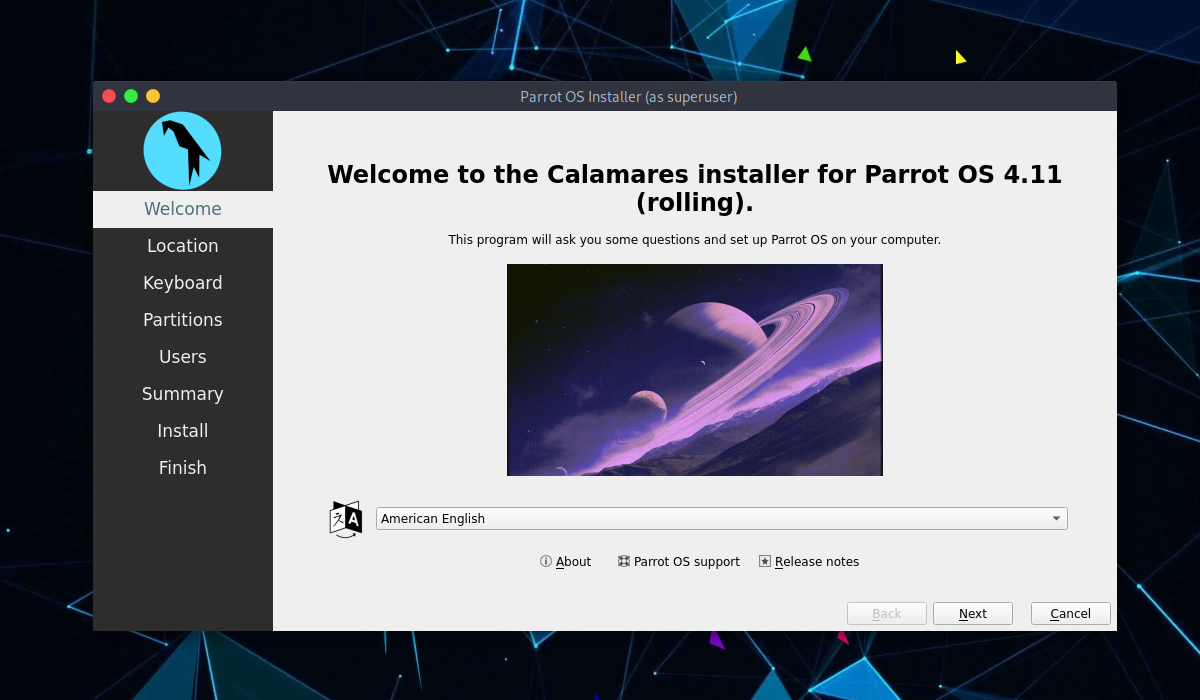
Для запуска установщика найдите на рабочем столе ярлык Install Parrot после открытия которого появится приветственное меню, в котором также можно выбрать язык системы:
Графический установщик, похож на установщик Debian, это не удивительно, учитывая на чем основана система.
Шаг 3. Выбор часового пояса
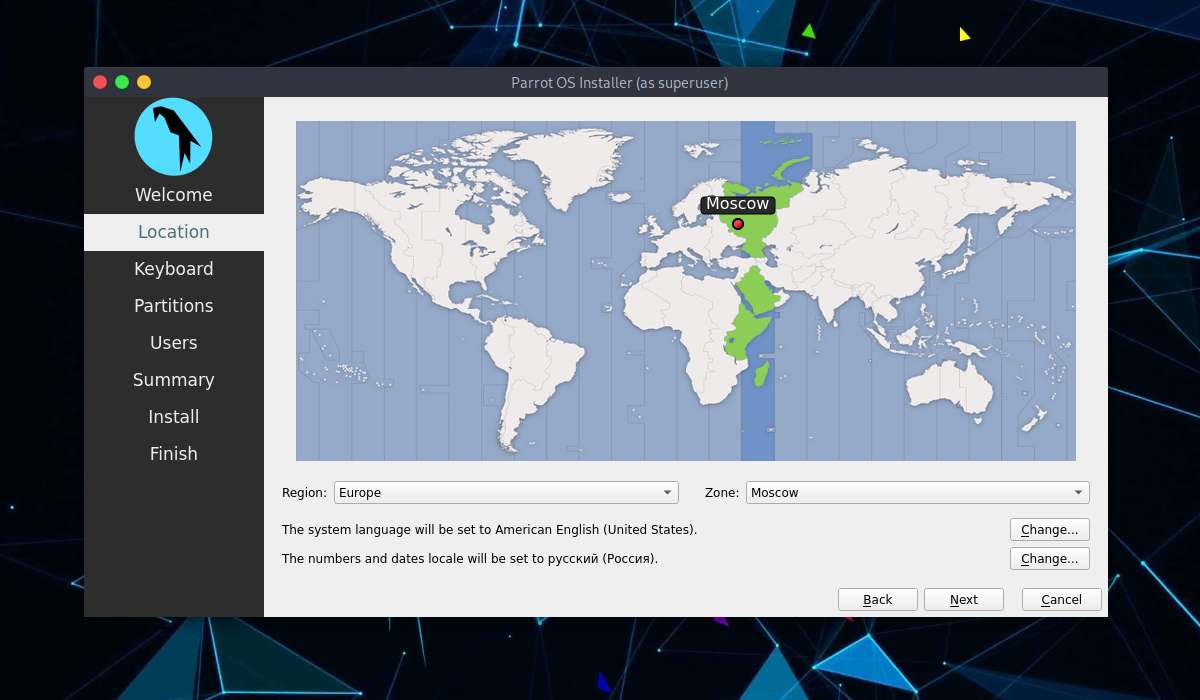
Далее необходимо выбрать часовой пояс:
Шаг 4. Выбор раскладки клавиатуры
Выберите язык для раскладки клавиатуры:
Шаг 5. Разметка диска
В качестве разметки диска будет выбрана автоматическая разбивка диска:
Шаг 6. Создание пользователя
На данном этапе установки необходимо придумать имя для создания нового пользователя, придумать имя для компьютера и задать пароль для пользователя:
Шаг 7. Предварительный просмотр изменений
На данном этапе установщик отобразит все ранее заданные настройки. Нажмите на кнопку Install для начала установки операционной системы.
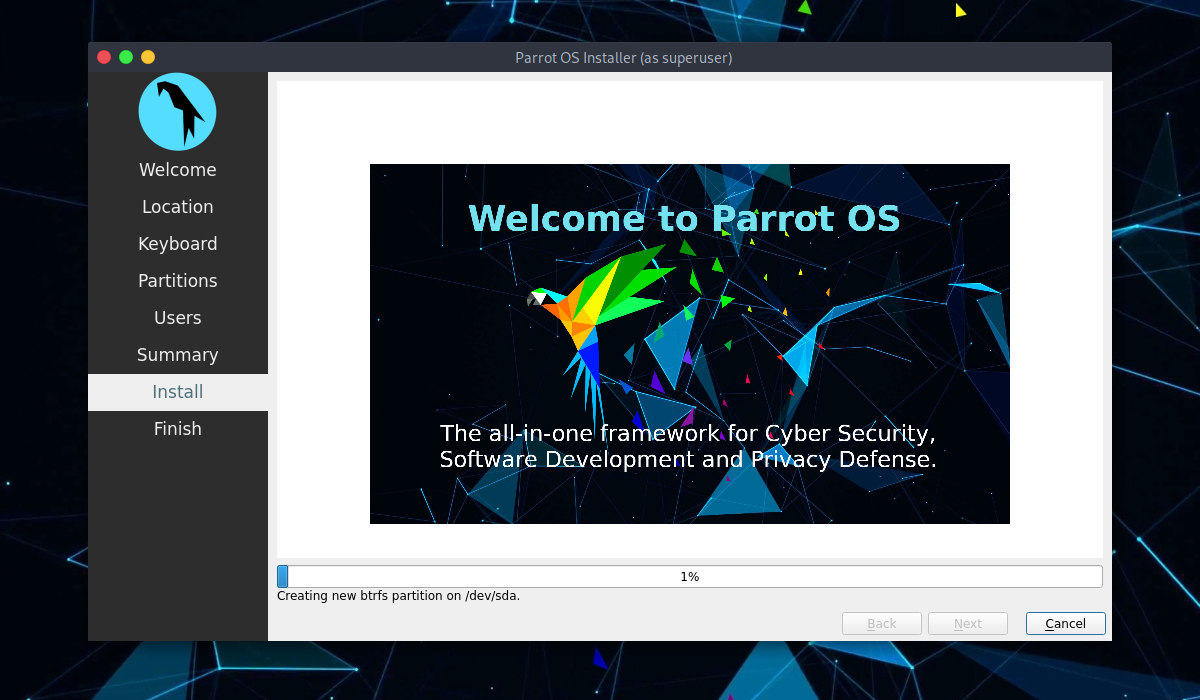
Шаг 8. Установка
Начнется установка системы, которая может занять 20-30 минут:
Шаг 9. Перезагрузка
Установка системы на жесткий диск завершена, теперь можно перезагрузить компьютер:
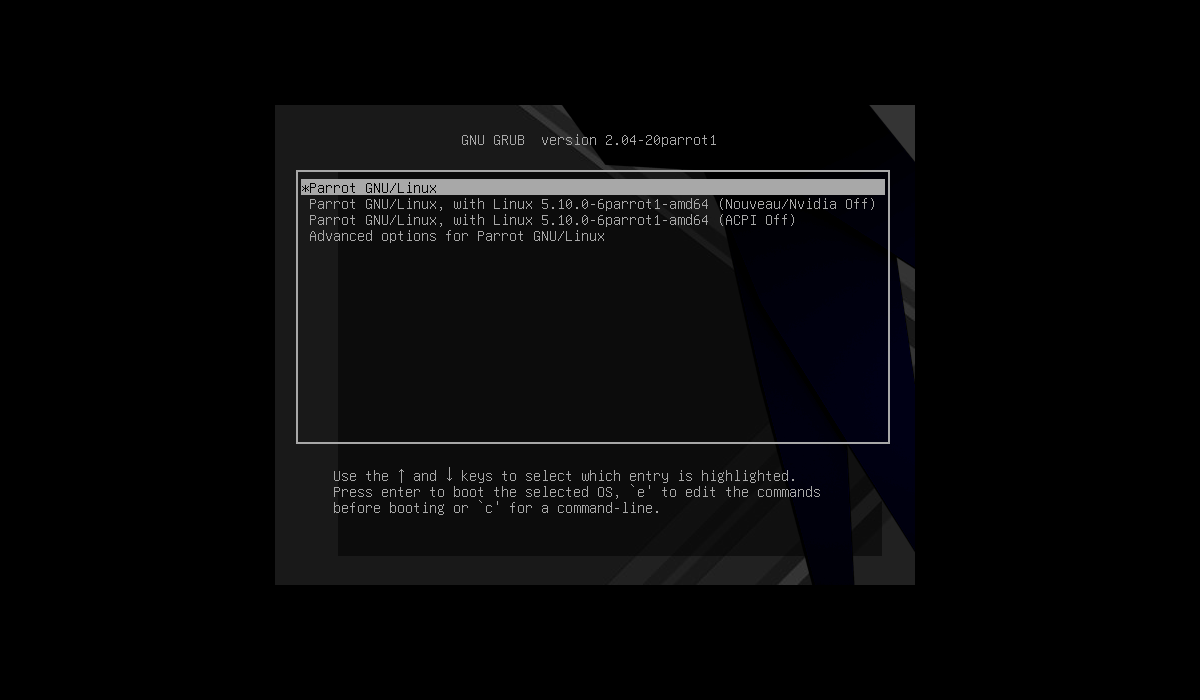
Шаг 10. Загрузчик
После перезагрузки, в меню загрузчика необходимо выбрать первый пункт:
Шаг 11. Вход в систему
Для входа в систему необходимо ввести логин и пароль, указанный во время установки:
Шаг 12. Готово
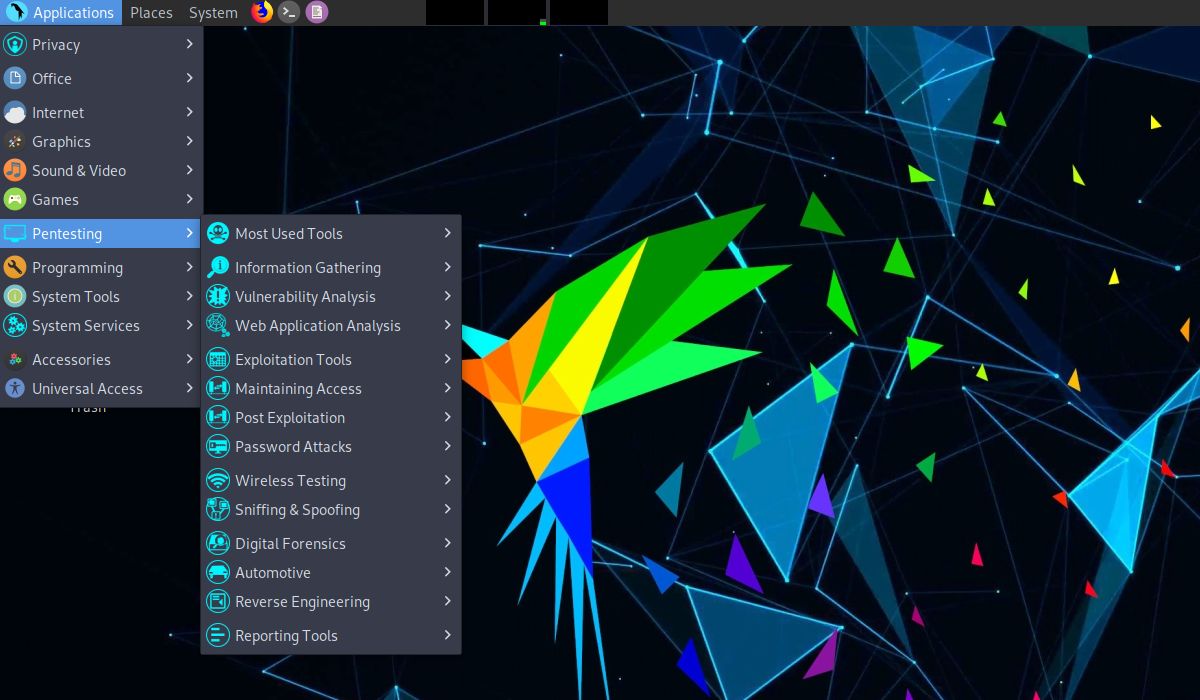
Установка Parrot Security OS на компьютер завершена и теперь можно перейти к использованию системы для тестирования безопасности используя различные программы, которые поставляются вместе с операционной системой:
Выводы
Установка Parrot Security OS полностью завершена. Действия установщика и сам внешний вид похожи на установку Debian. А как вам эта система? Напишите в комментариях!
